XJ470 APM copter – flight video

Spring is just started, but it’s still cold out there. After I tuned XJ470 APM copter, I took a video at the airfield near my house.
This is my final tuned PID parameters. I tested with both 1038 and 1238 propeller, and finally decided to go 1238 propeller:
xj470_pid

This is the video what I took:

The overall flight time was more than 16 minutes and hovering time was 22 minutes with carrying camera gimbal using 4s 5200mah 10c lipo. It was outstanding.

XJ470 Folderable drone – APM based quad

I’ve lifted up Quanum venture of 450 class drone. She was beautiful and nice looking drone. But it hasn’t enough power to load gimbal and camera, and not enough flight time which was around 10 mins without gimbal&camera. It maybe solution attach a big battery like 10,000mah. But there wasn’t enough room to carry this in the bay.
So I decided to build a new drone which is light weight, more powerful, able to carry more payload and easy portable.

Here is the part lists:

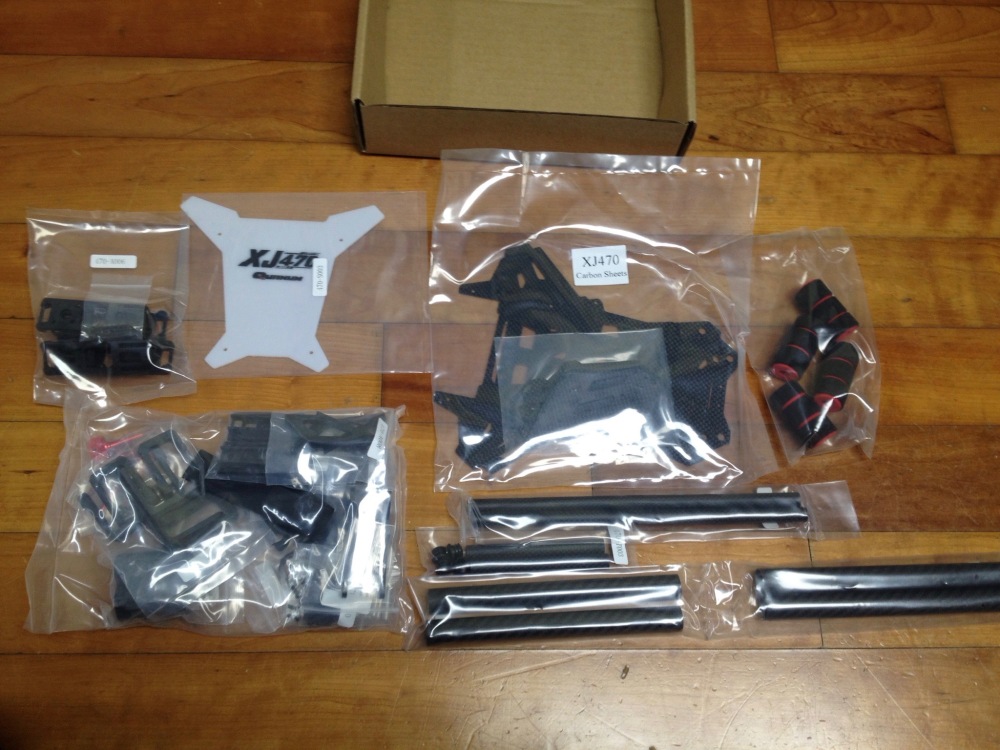
  1. Frame : XJ470 carbon folderable frame kit
  2. Motor : Sunnysky X-3108S 720KV
  3. ESC : RCtimer 20A SimonK firmware opto.
  4. FC : APM 2.6 flight controller
  5. Receiver : Devo 701 7CH RX
  6. Telemetry : 3DR radio telemetry v2
  7. GPS : Ublox Neo-7M
  8. Power distribution board : Quanum power board with 5v/12v BEC
  9. LED : KK260 LED module (5V)
  10. Video Tx : Boscam 5.8Ghz 200mw Video transmitter
  11. APM power module 2.6
  12. Gimbal : Walkera 2axis gimbal
  13. Camera : Xiomi Yi
  14. Propeller : APC 1238 propeller
  15. Battery : Multistar 4s 5200mah 10C

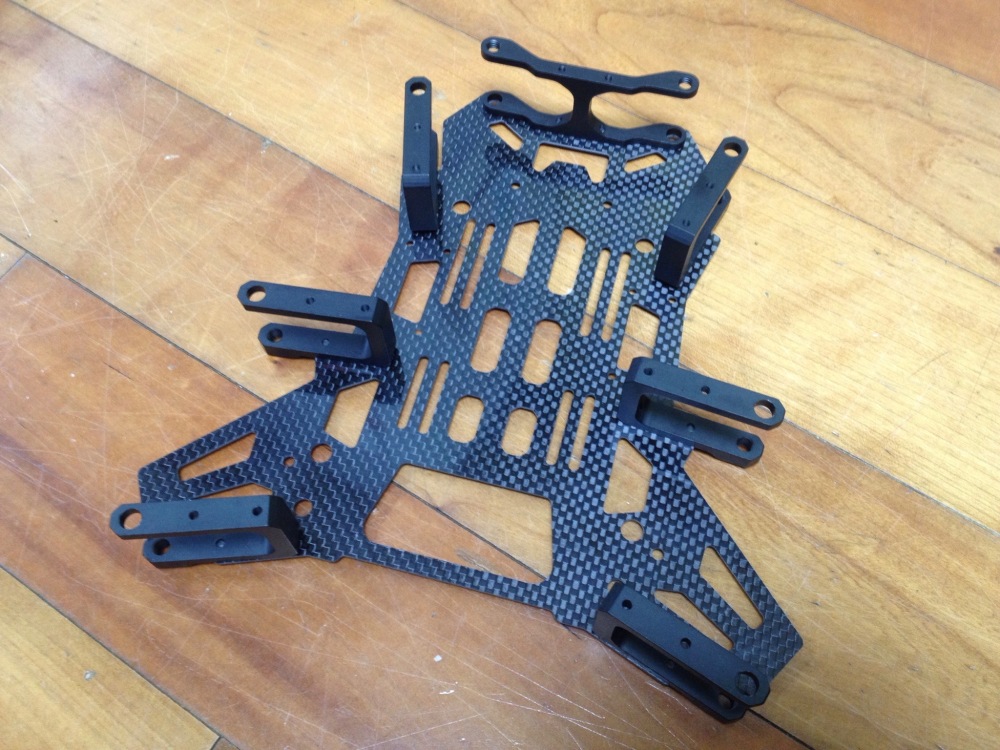
This is Frame kit. I think this body wasn’t big enough to put those parts. Actually, I spent some hours to layout and placed the parts in small space. But the arm length is enough long to attach 12inch prop. Overall frame weight was over 400grams.
IMG_0205

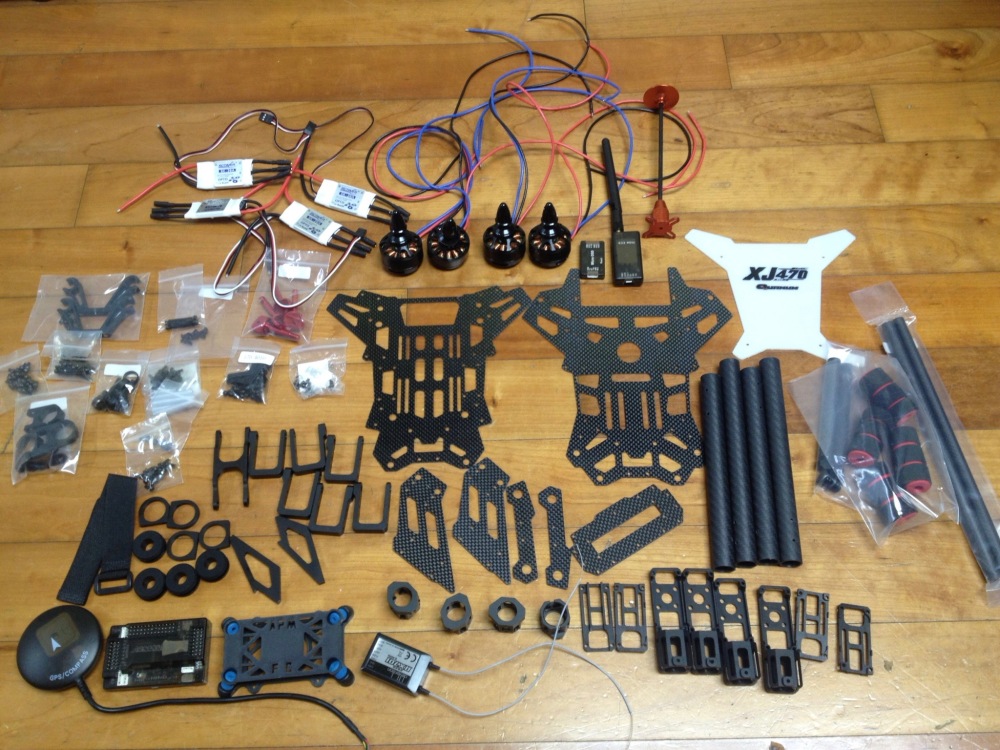
Here were the part lists what I built. The motor size was big what I expected. The frame were  composed to 3k carbon fiber and aluminum, no cheap plastic parts. This was so cool.
IMG_0206 (1)

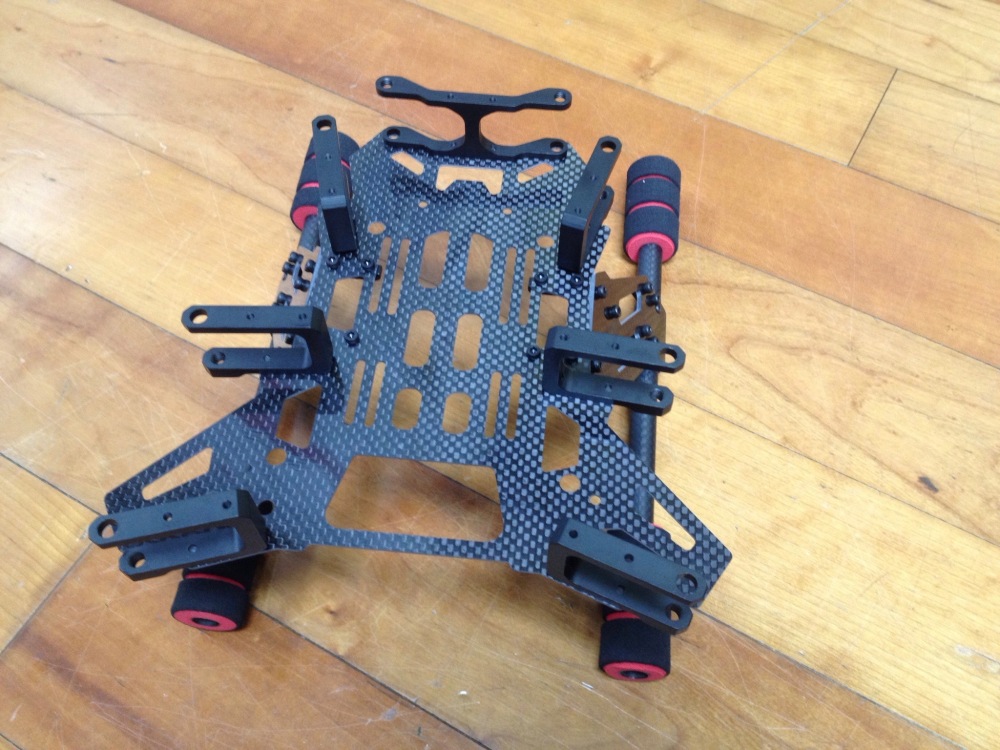
At fist I assembled the hinge spacer parts onto under plate.
IMG_0208.jpg

This is landing skid assembly. I think this is a little bit short. I may need to order longer compatible bar.
IMG_0207.jpg

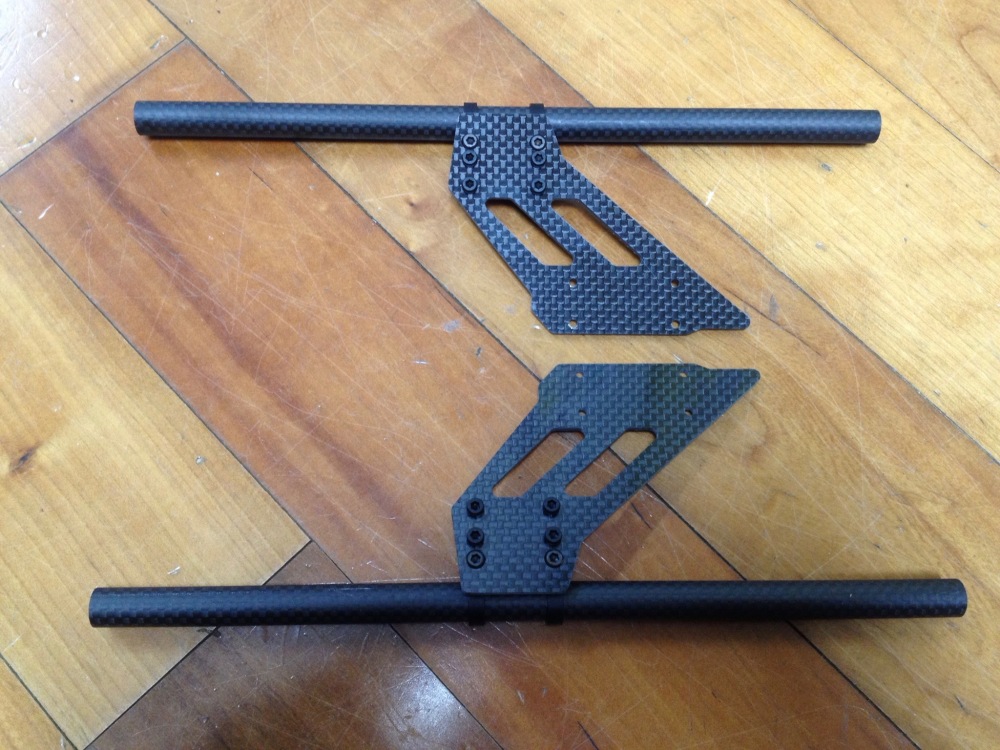
And I attached these under the under plate.
IMG_0210

This is arm assemblies. Back arms are a little bit longer than front arms.
IMG_0209

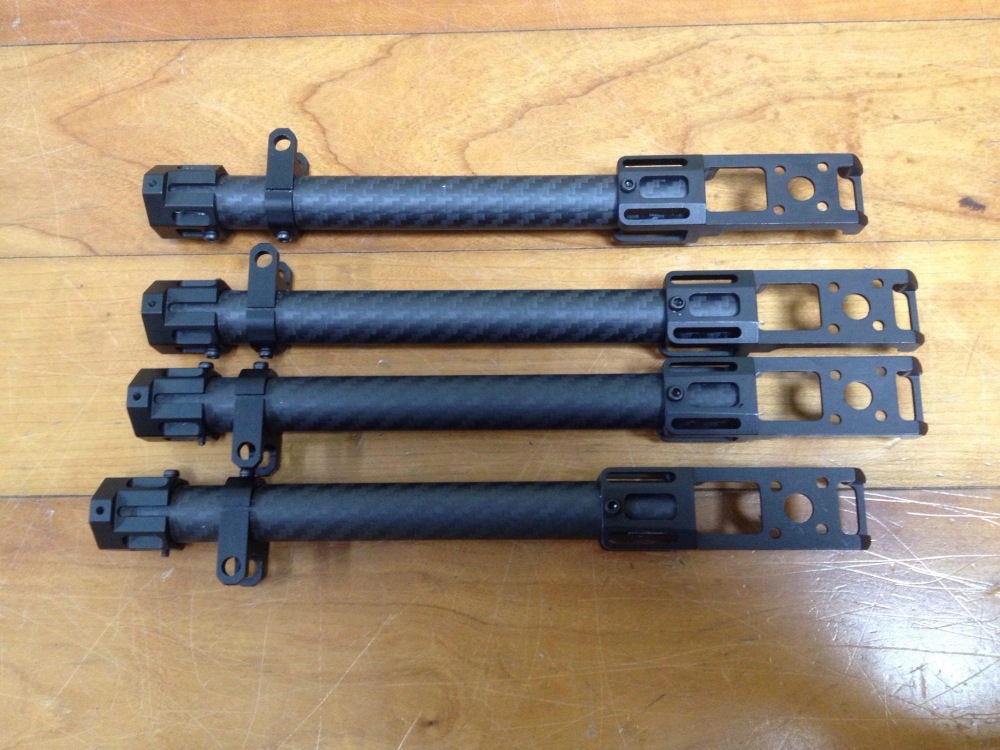
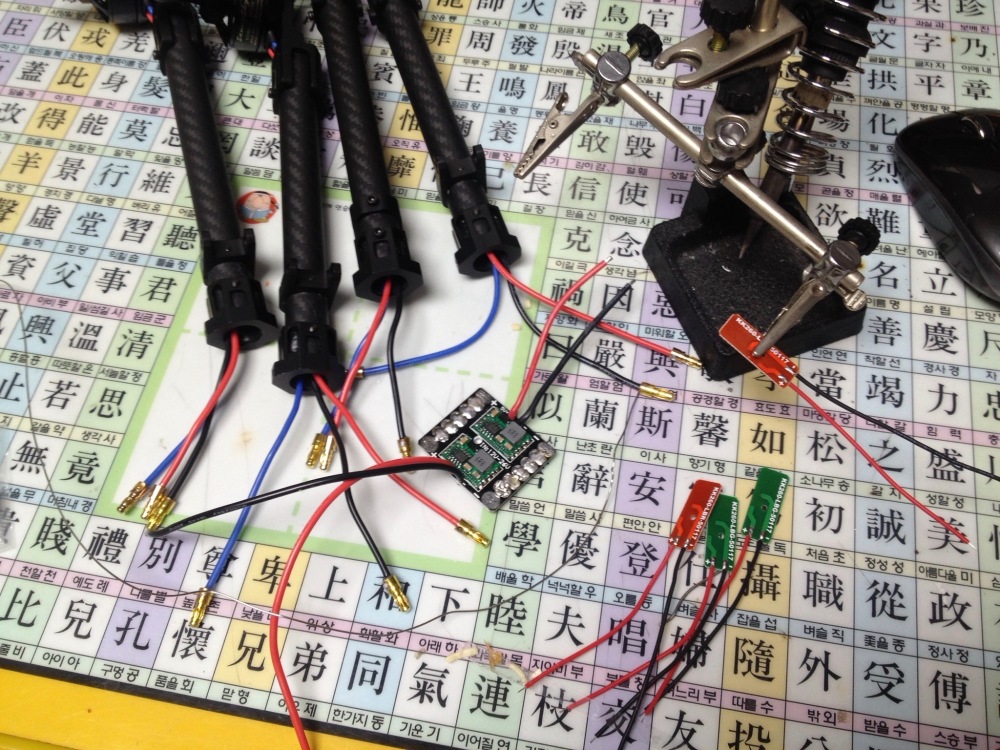
Then I attached 4 motors onto each motor mount of the each arm, take out the motor cables through hollow arm, soldered banana connectors at the signal cables, attached wires for 5V/12V power onto power distribution board and prepared LEDs where will be placed under the motor mount.
IMG_0211 (1)

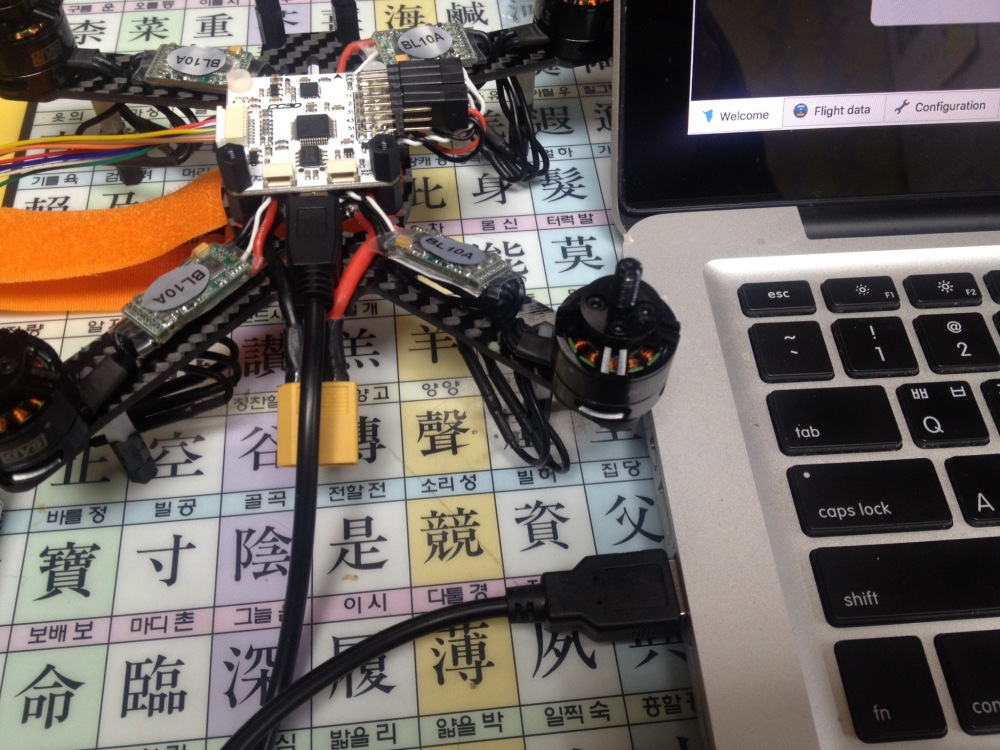
I struggled find out a space to put 4 ESCs for several hours. It should be thin or mini ESCs so that could insert these into each hollow arm. Anyway this is the solution what I found that placed two ESCs onto front side, another two ESCs onto back side and tighten these up using cable tie, and then placed power distribution board onto back side ESCs, and soldered power wires of ESCs.
IMG_0212

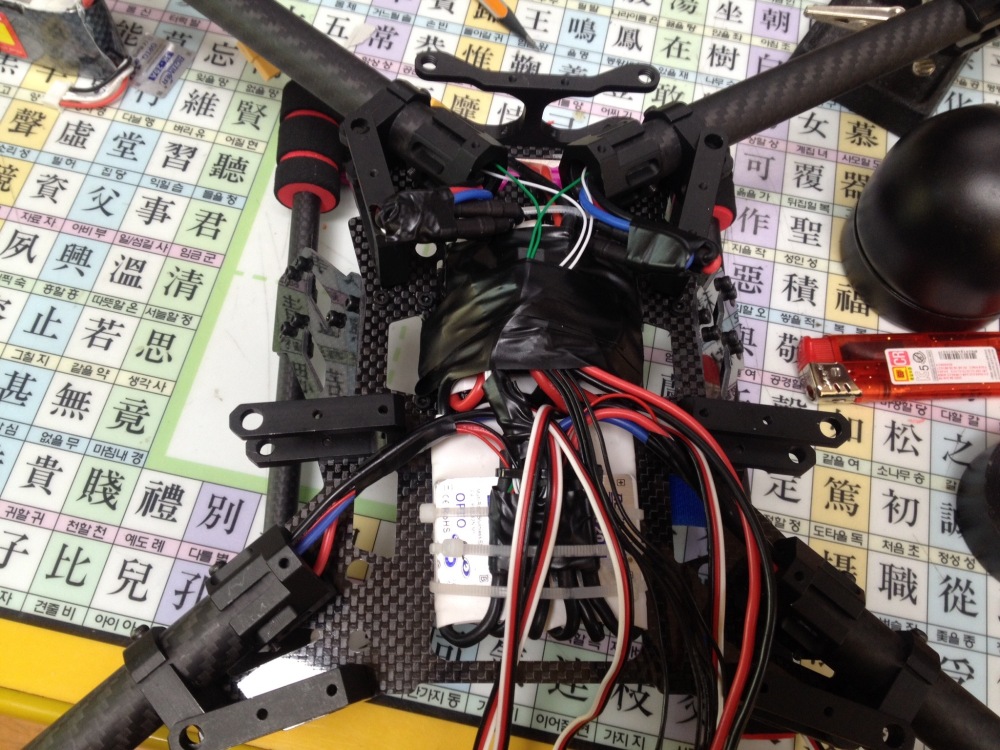
Next was put upper plate hinge spacer and take out the wires.
IMG_0213

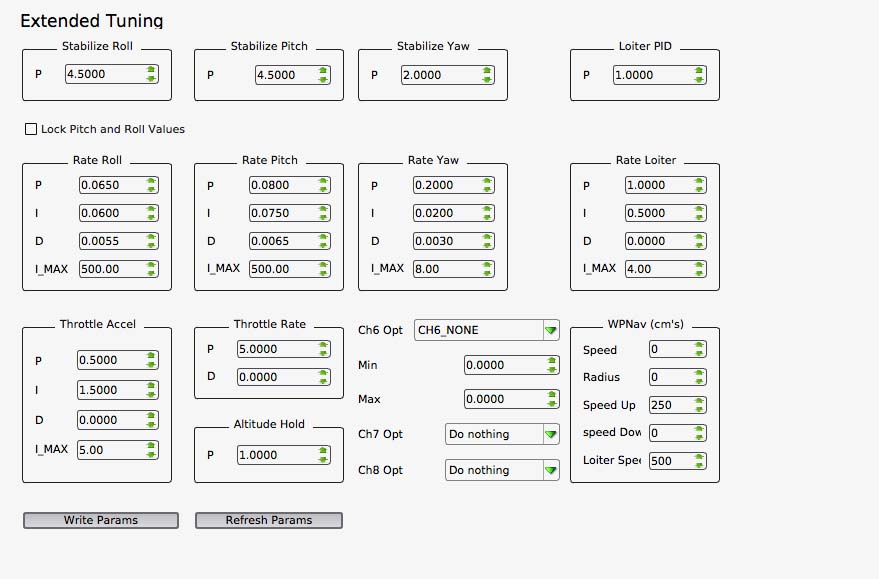
And I put the APM FC board onto center of gravity, and connected RC receiver and 433Mhz radio telemetry.
IMG_0215

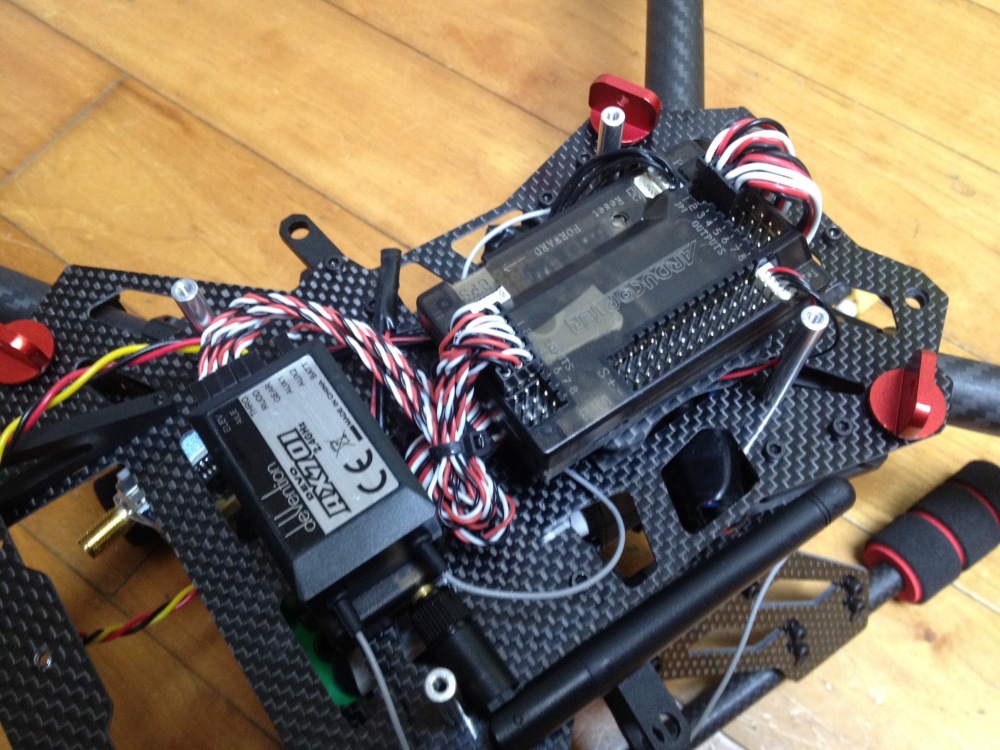
Final extra things were attaching LEDs, mounting gimbal, connect 5V power & video signal cables into Xiaomi action CAM, attaching GPS and Video TX. I drained 5V power for action CAM from APM FC.
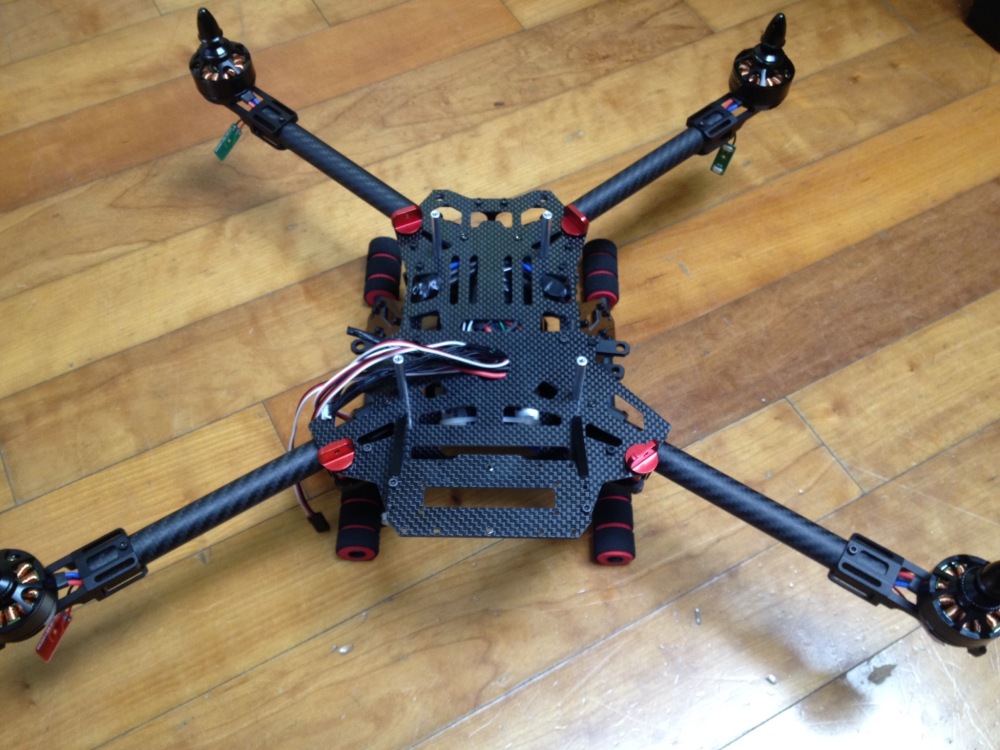
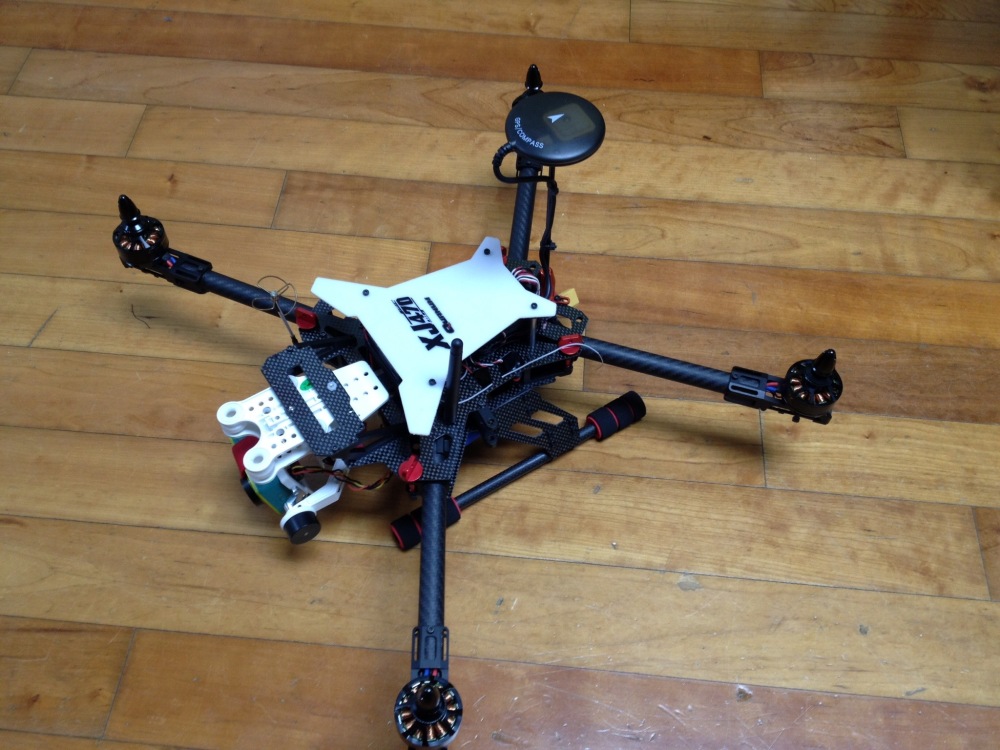
Here is the result:
IMG_0260

And this is the figure when she was folded.
IMG_0256

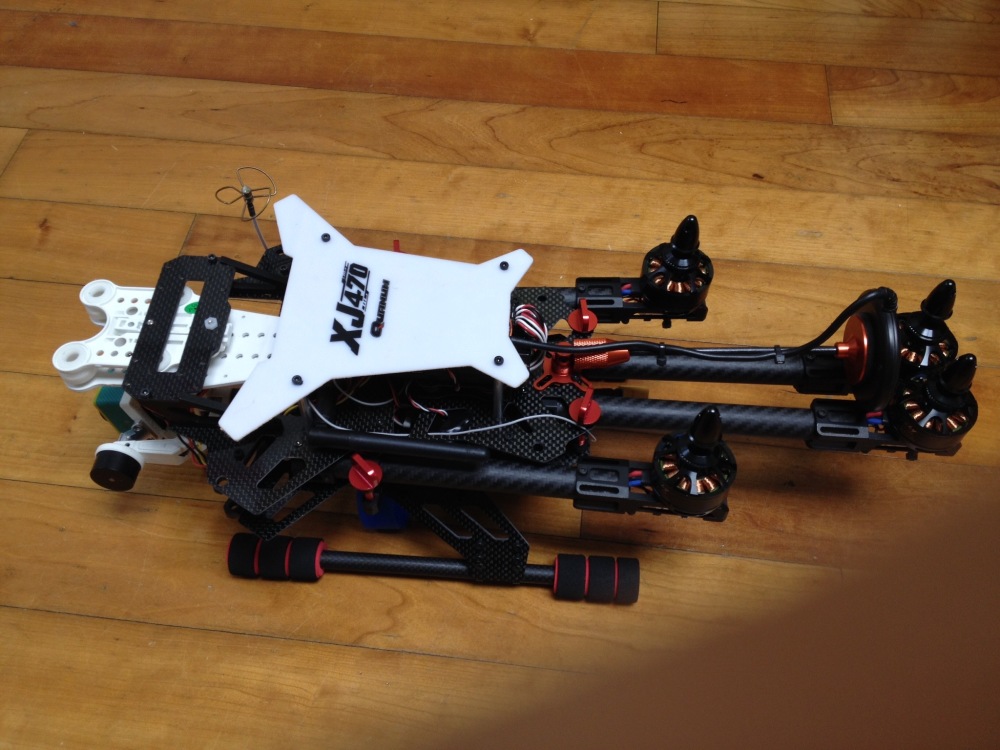
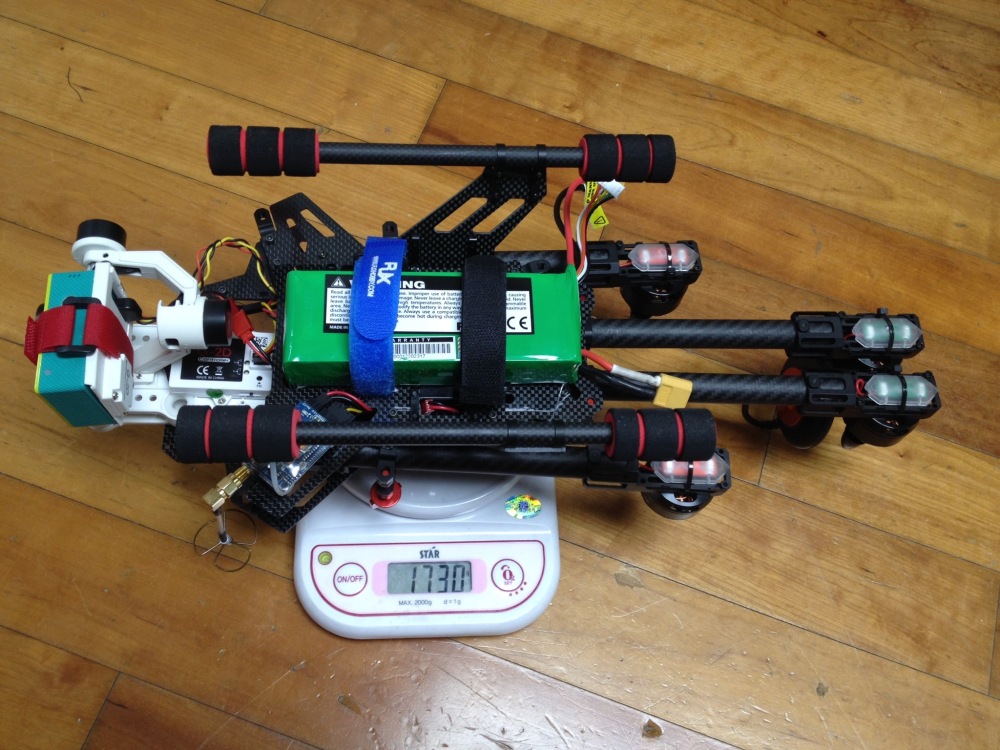
Total weight including CAM gimbal set and 5200mah battery was over 1.7KG. I’m afraid that she can hover for 20mins with 12inch props. It will be under 15 mins in my guessing.
IMG_0263

CC3D openpilot setup and testing flight

I introduced micro drone building using cc3d board at last posting. As you know, it’s peace of cake to assemble the drone hardware for hobby enthusiast. Now I introduce how to setup the openpilot software onto cc3d board. Openpilot is very easy and provides intuitive GUI. Every setup process was wizard driven so that there was just clicking efforts. I download R15.02.02 at here. After installation and double click the shortcut, initial screen as below was displayed.
open1

The first thing to do is connect the cc3d board into a computer using mini usb cable.
IMG_0156

And click the Vehicle setup wizard of the openpilot software. Configuration progress were these steps: firmware update –> select RC input type –> select vehicle type –> select ESC type –> accelometer calibration –> ESC calibration –> motor ouput calibration –> transmitter configuration –> Flight mode setup. When update the newest firmware, there was one thing should consider that don’t connect usb cable into the labtop before click the ‘Upgrade’ icon.
open3

All the steps are wizard driven, so I think anybody can do this just following the instruction as described onto setup wizard. For flight mode setting, I could select 3 types which are attitude, rattitude and rate mode. Attitude mode is that both Gyro and accelerometer are engaged to control the copter stabilization so that make more easy control. Rate mode is that only Gyro is engaged. Most racing drone enthusiast using this mode. Rattitude mode is mixture of attitude and rate mode.
open17

The last thing for setting is PID_tuning. This is the hardest job for beginner. But the steps are not complicate. There is so great guide for this at diydrone forum. I switched the flight mode to rate and gained pitch rate on Inner Loop. And then, switched the flight mode to attitude and gained pitch rate on Outer Loop. Here is the result I tuned.
pid_cc3d

Here is the testing flight. She flew 7 mins with 1000mah 3s lipo.

My overall rate of cc3d FC and openpilot is 5 starts. There was no autonomous features like APM, but setup was so easy and default PID setting was so stable so that don’t need to edit or tuning the PID value.

Quanum venture quadcopter part 2 – Parameters setting and making RTF

When I meet the Mission Planner and APM flight controller for the first time at last year. I remember it took several weeks to set up complex parameters of Ardupliot. But now it’s only just a minutes job. This is common workflow of Mandatory HW and parameter setup : Select Frame Type –> Compass calibration –> Accelerometer caibration –> Radio calibration –> Set Flight Modes –> Set Failsafe –> Set Battery Monitor –> PID tuning –> ESC calibration 1. Quanum venture is H type frame, but this is perfectly square, so it is Okay to select ‘X’ Style for Frame Type. HW-frametype

2. I had some trouble to get exact compass point during Compass calibration. Several trial and error, I founded my GPS orientation is Roll 180, Yaw 45. Compass

3. Accel, Radio Calibration and set Failsafe : refer to my previous post as below
– Initial settings and calibration of APM

4. My Devo 7 RC transmitter only have 7 channels, so I just can assign 3 flight modes as Stabilize, Alt Hold and Loiter (But I may can use others when I use mobile App of mission planner with 3DR telemetry module.) Flightmode

5. I used APM 2.6 Power module to feed 5V to APM and monitor the state of battery. So I needed to set Battery Monitor. PowerModule

6. I think the hardest part of setting might be PID tuning. I bet most DYI enthusiast will agree this. But the good news was that new released arducopter firmware supports auto tune option, I will try this after first testing flight. I loaded previous saved PID values of F450 quadcopter. PID

Final setting was ESC calibration, I added on LEDs after done this, made  this RTF (ready to fly) and added android device. IMG_3807

APM parameter settings of F450 quadcopter

After badly failure at the first trying to lifting up, I reviewed my parameter settings and I realized that I should tuning my quadcopter especially on PID setting.

A PID which stands for proportional-integral-derivative is a control loop feedback mechanism. This is very complex algorithm, but I should understand what this is to make stabilized drone. (About detail things about PID control, refer to wikipedia here.

I opened Mission planner and selected CONFIG/TUNING menu to check those.

There some sub menus of this which are Flight modes, Geo fence, Basic tuning, Extended tuning, Standard params, Advanced params, Full Parameter List and APM Planner 2.0 config.

1. Geo Fence

Geo fence have drone do not fly above the limited altitude and distance. Here is what I set.geofence

2. Basic Tuning

With this tuning value, I can make my Quadcopter maneuver sluggish or agile. I set this to sluggish and very softly. (You know, my drone was crashed caused by unintended movement at last time.)

basic_tuning

3. Extended Tuning (PID setting)

PID setting is very important to make stabilized maneuvering of Drone. But this is difficult to find out right values. So I googled and found out proper reference value. this values are interrelated to the weight of drone, the motor power and its RPM. When I looked up the reference, I found out that my origin P values are so high. I corrected those.

PIDvalues

4. Standard parameter

At this setting, I set ‘disable’ the pre-arm check. When enable this, APM check the GPS, barometer, compass and related parts are ready and heathy before arming the motors. If these components are not ready, the mission planner spread warning message and motor isn’t armed. When test the drone indoor, GPS will not fix the position and this will be brought that warning message at pre-arm check. I also select ‘Do NoT Spin’ on ‘Motors always spin when armed’

standard_parameter

5. Full Parameter List

At this menu, all set parameter are shown as table form. All values are editable.

full_parameter

Hope she will be able to lifting up very nicely at this weekend with this tuning, no crash anymore.